Dark Photography

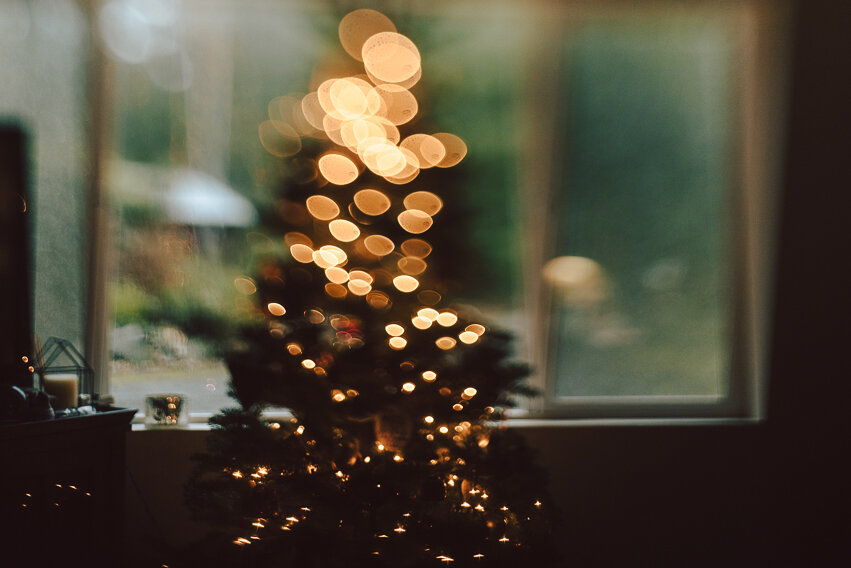
2.5 sec | f/4 | ISO 50 - on a tripod
1/125 sec | freelens | ISO 500

1/640 | f/1.6 | ISO 320
PHOTO CHALLENGE | Take photos that represent dark photography, think widely about this prompt, get creative, and show us what you shoot!
Let me preface this by saying how much I truly love a dark scene and approaching it with my camera and the challenge to capture something. Shooting with minimal light can be incredibly challenging, it’s also a testament to how well you know how to work with your camera. Let’s dive into how to take photos with ‘dark’ in mind.
By late fall and through winter, our primary light source (the sun) has all but abandoned us. You have roughly four hours a day of decent overcast light to work with, but if you can’t get to it in those hours, you’re left with few other options. Of course, you could use studio lights, but my future studio space isn’t set up yet, so I’m working with what I have and it’s likely that you are too.
Dark photography doesn’t have to mean truly in the dark, it can mean a dark mood, tone, or emotion.
If you are working with enough natural light and are still aiming for that dark mood, you can always distance yourself from the light source to gain more control. A composition technique that should be thought about in dark photography in order to make the image appealing, is having a bright area in your frame. Whether shooting in the darkest of scenes or controlled light, you still have to be mindful of your light source. This will draw in the viewer’s attention in the area of greatest contrast. Our eyes are naturally attracted to areas of contrast and with dark photography, the image will predominantly have dark tones. Incorporating tonal range will allow the image to keep the viewer’s interest, meaning there’s a balance between that light and dark contrast.
Let’s simplify all this:
Whether or not you’re shooting with natural or artificial light, turn off all overhead lighting.
Take note of your primary light source (and secondary too, if there is one).
Your exposure meter will likely not understand what you’re doing, so it’s important that you look through your view finder and decide for yourself if there is a good tonal balance.
Your histogram, however, should show you there’s enough light to make your image appealing. You can truly access this in post processing, and even bring out more of the light if you need to.
Ensure that the light source is illuminating your subject in a way that makes sense and is visually appealing:
You should only allow enough light to illuminate your subject.
To enhance tonal balance, try backlighting your subject, side light, or direct. It not only creates moody lighting but also brings out the texture, shapes, and color.
It’s okay to use your tripod. Would you guess the top image was taken with a tripod? It was. I held still to ensure I didn’t create motion blur with a lower shutter speed, then had someone gently press the shutter. I went this route because I had no other light available and didn’t want to use a high ISO for this shot to simplify the scene and to enhance the tone and mood.
Take a look at each photo on the left, did you notice that each image has two light sources? Can you identify both the primary and secondary means of light?